Booting From Bifurcated Enterprise Flash
I decided to get into the world of enterprise m.2 NVME flash. As it turns out, booting from enterprise flash comes with some quirks. Especially for older or transitional BIOS. For anyone running a Supermicro SuperServer 5038MR-H8TRF or a X10SRD-F motherboard, here’s what worked for me.
The Hardware
For those not interested in visiting Supermicro’s website to see what hardware I have, here’s some images:
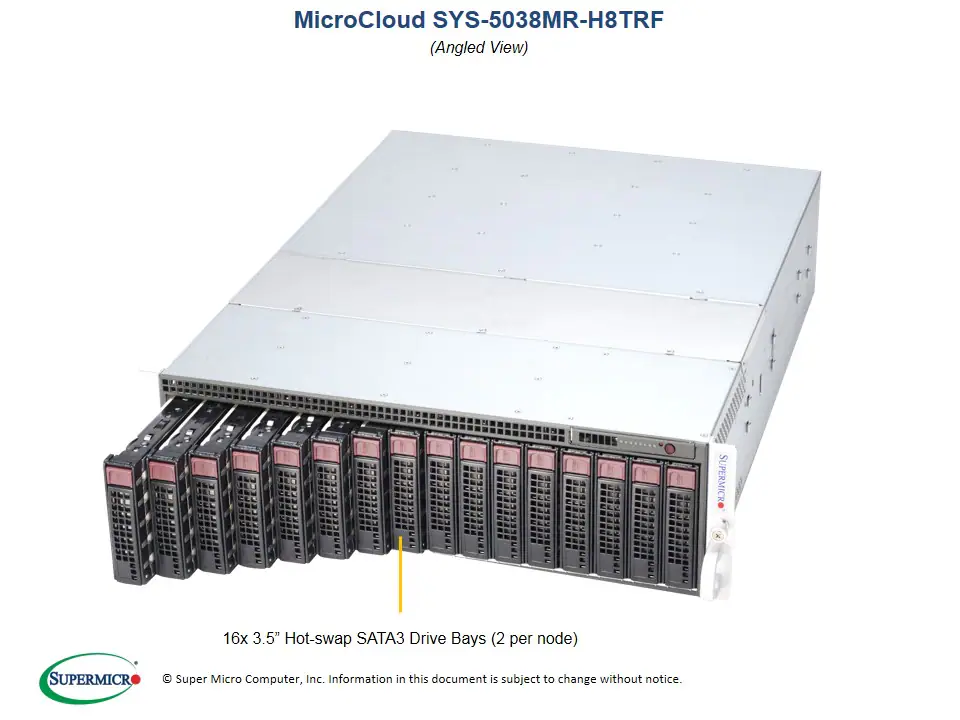
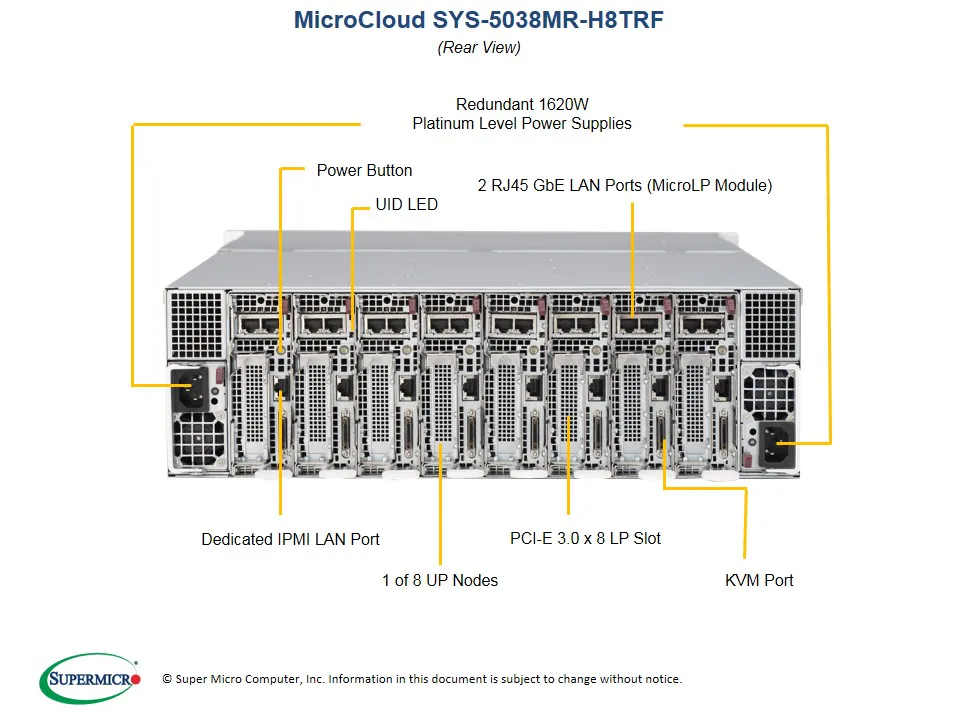
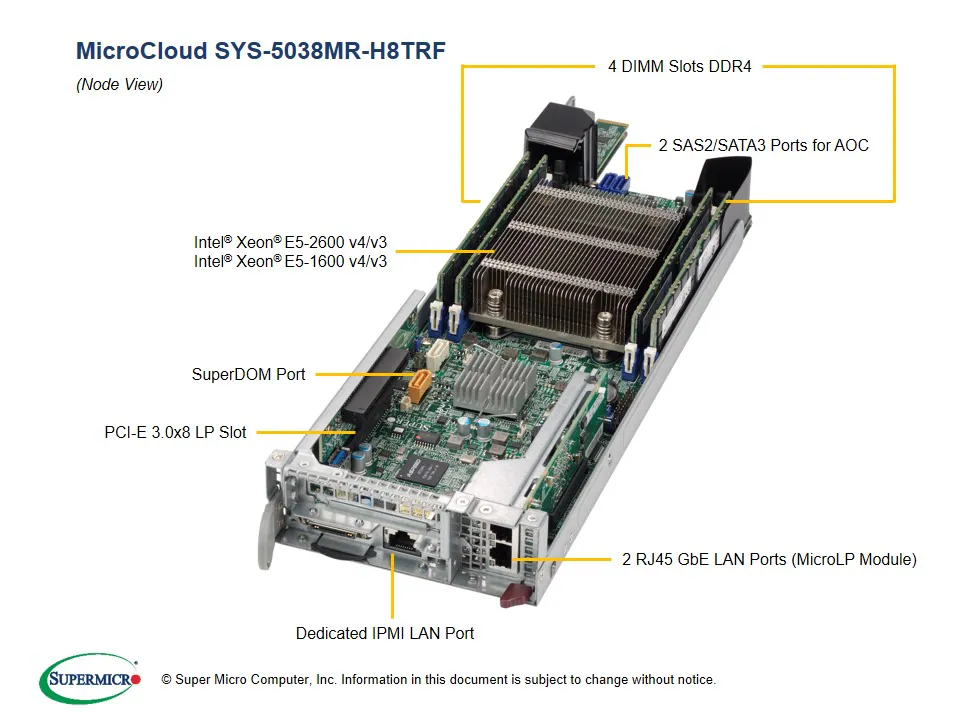
8 nodes in 3U is pretty good compute density. Sure, modern hardware can do 8 CPUs in 4 nodes in 2U, with better RAM density and more drives per node. But for pure node count, this chassis can do 112 servers per 42U rack, whereas a 2U/4 node can do 84 servers. Whether this is an advantage or not depends on your situation, but when you care about HA in a compact rack, there’s an advantage to this chassis.
The disadvantage is, of course, that it only has a single x8 slot of PCIe expansion, and a MicroLP slot. So, each node has to serve a single purpose, and can’t really scale its ambitions.
In the case of ceph, since there’s no on-board m.2 slots, we’ll have to settle for 10gbps networking in the MicroLP slot, and a consumer-grade x8-to-2x-m.2 bifurcation card in the x8 slot. The bifurcation card will give us 2x m.2 Gen 3 NVMe drives. My card is an Amazon special, so it does not have a PCI-e switch chip. That means we’ll have to change BIOS settings, which I’ll show how to do in this post.
For the m.2 drives, I have two Samsung 983 DCT drives (search ebay for “PM983” or “MZ-1LB1T90”). It appears as though these drives might only work in UEFI systems, but I did make that work in my servers (YMMV).
Step 1: Update the bios
If your current bios isn’t from 2021, or is older than 3.4, get the latest version from Supermicro’s website. Whether this step is necessary or not is an open question, but in my view, it eliminates variables.
Step 2: Change BIOS Settings
The boot drives I’m using are UEFI-only, but the NIC appears to be Legacy-only. So, this selection of hardware firmly requires Hybrid/Dual boot. Good thing this server has that mode!
All of the settings for today’s adventure will be under the “Advanced” tab. If you’ve changed anything around the boot process or Option ROMs, run the “Reset to Optimized Defaults” routine. This post starts from defaults, and makes small changes to get things working. I can’t speak to every setting that could break your boot process.
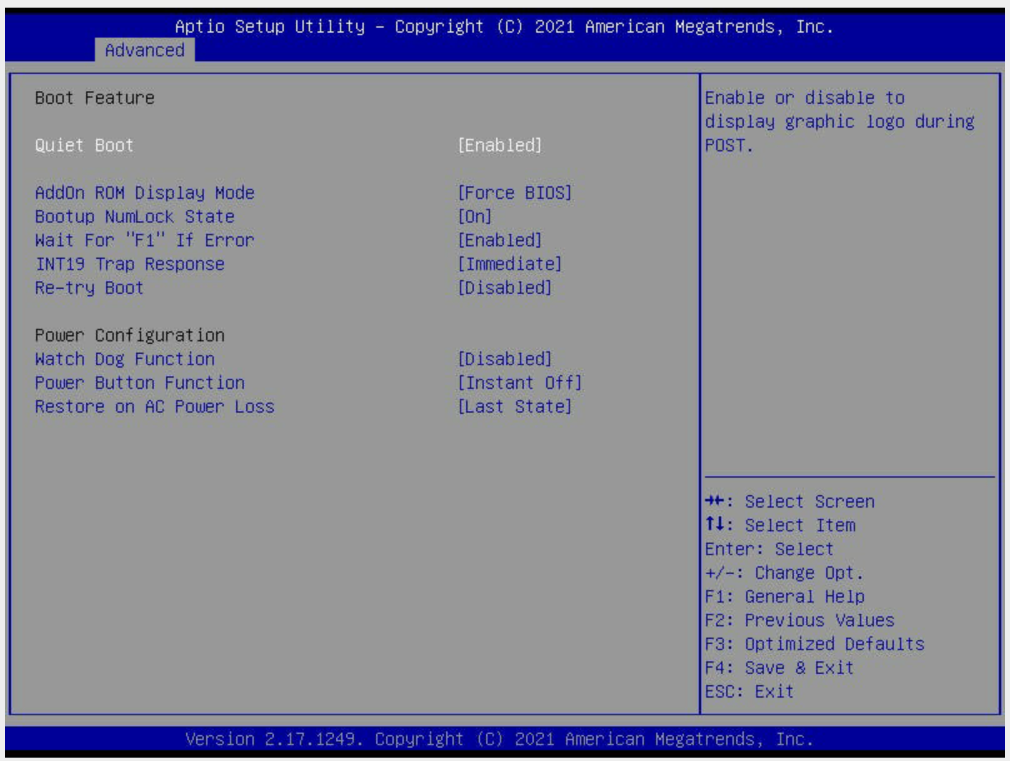
Screenshot 1: Boot Feature
I’ve changed “Quiet Boot” and “AddOn ROM Display Mode” pretty freely without issues. The rest of this screen I left alone.

Screenshot 2: Chipset Configuration > Northbridge > IIO Configuration > IIO1 Configuration
Yup they buried this stuff.
- The important setting is “IOU1 (IIO1 PCIe Port 3)”. Make sure that’s bifurcated appropriately to your setup.
- Link speed you might need to fix in your setup, but Gen3 is correct for my hardware.
The rest I left at default.
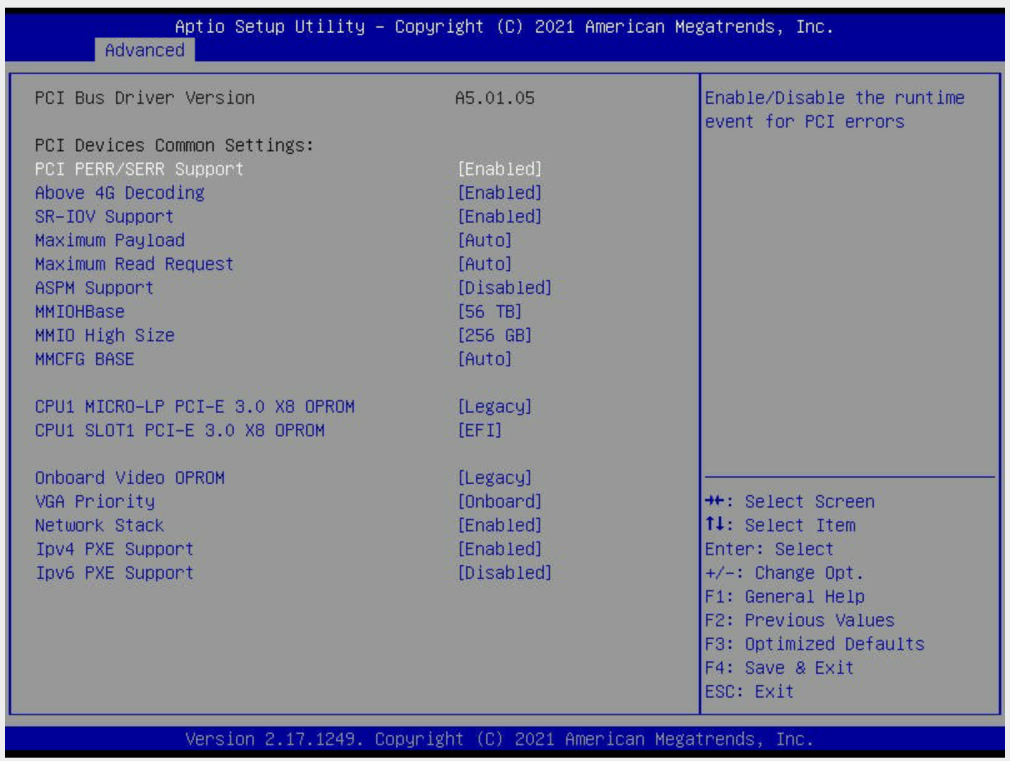
Screenshot 3: PCIe/PCI/PnP Configuration
- I enabled “PCI PERR/SERR Support”, “Above 4G Decoding”, and “SR-IOV Support”. Probably not strictly required, but they should be default.
- You’ll also need “CPU1 SLOT1 PCI-E 3.0 x8 OPROM” to be set to “EFI”.
- Leave the Video/VGA settings on default.
- If you need netboot, make sure it’s enabled with appropriate support for IPv4/IPv6.
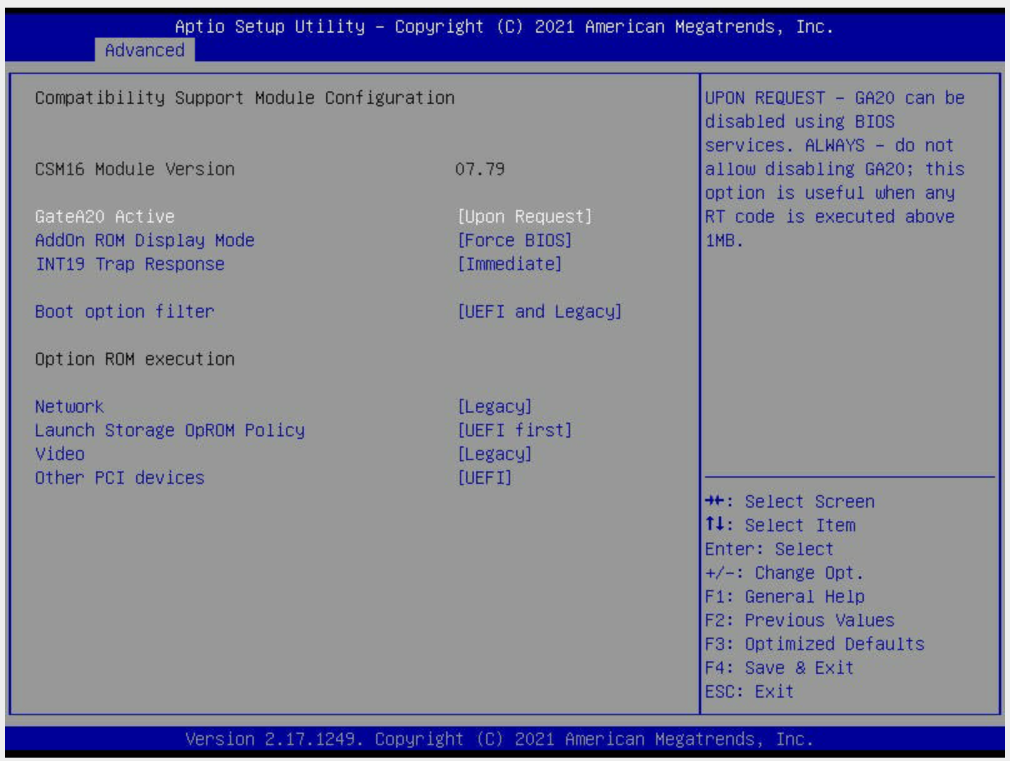
Screenshot 4: CSM Configuration
- I suspect “AddOn ROM Display Mode” can be changed freely, but I’m not sure I’ve confirmed that.
- “Boot option filter” must be set to “UEFI and Legacy” to allow both NVMe boot and network boot.
- “Network” must be set to “Legacy”
- “Launch Storage OpROM Policy” I changed to “UEFI First” and never experimented with
- “Video” should be left at “Legacy”.
Finally, tune your boot order to your preference.
Save & reboot, and you should be able to boot from both your m.2 drives, and also the network (if you have netboot setup)!